m.nlcode.nl
![]()
![]()
m.nlcode.nl is software for working with MIDI.
![]()
![]()
m.nlcode.nl is software for working with MIDI.
If you are new to m.nlcode.nl, this is your starting point. Please read all the pages below.
This project is in beta stage, which means that you should expect some bugs and rough edges.
Please note that although the version may be something like 1.0.x, with x being some digit, this does not mean that m.nlcode.nl is out of beta. The first golden release will have version number 1.1.0. This is due to limitations of the build system.
A requirement for use of this application is some basic knowledge on the Musical Instrument Digital Interface or MIDI. You should know about MIDI messages like note on, note off and others. You should also know about MIDI ports, both in hardware and software, and how every port supports sixteen distinct MIDI channels.
Some knowledge on how to make music would also be handy.
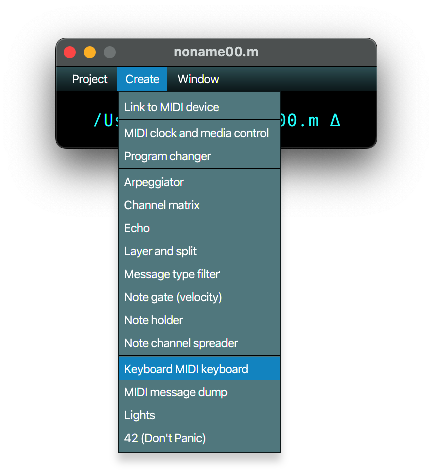
The application m.nlcode.nl is a collection of relatively simple parts that are focussed on doing one thing with MIDI data. The basic thought behind this component strategy is to create something with a limited functional reach, but a depth and or simplicity in what it does. Every part has a narrow focus on a specific functional area. These parts can be connected to one another to chain their data through an m.nlcode.nl project. Such a part is referred to as a MidiInOut part.
If you are accustomed to a unix style command prompt, then this ‘do-one-thing-but-do-it-well’ will sound familiar. A unix command line usually provides a large number of specialized little applications and commands. The output of one command can be used as the input for another command. m.nlcode.nl works in a similar fashion. Big difference compared to a unix command prompt is that it is very easy to make one MidiInOut part send to multiple other MidiInOut parts. You can also let a MidiInOut part receive data from multiple MidiInOut parts.
The graphical user interface (or GUI) of m.nlcode.nl is made to be as simple as possible. The basic rule is (or should be) Don’t Make Me Think. All clickable items are easily identified on sight without any further action. So there is no need to ‘hover’ over a certain piece of text to see if it changes into a button of some sort.
All basic interaction is through left click only. No right-click, double-click, ctrl-alt-how-at-the-moon-while-tapdancing-right-shift-click or whatever should be needed UNLESS it is a very well known standardised action, like e.g. control-click to expand a selection with the item you clicked on.
No support for the visually impaired. Sorry. If you have an idea on how to solve this AND you are (or know) someone who can do the user acceptance testing, please contact me. I cannot guarantee anything,
m.nlcode.nl is written in UK English. There is internal support for multiple languages however. If you need a different language AND can do the translation as well, please contact me.
This project is in beta stage, which means that you should expect some bugs and rough edges.
Please note that although the version may be something like 1.0.x, with x being some digit, this does not mean that m.nlcode.nl is out of beta. The first golden release will have version number 1.1.0. This is due to limitations of the build system.
Installers (and possibly other stuff you might need, like JAR files) can be downloaded from Github. Look under ‘Assets’.
So far the easy part. Unfortunately things are almost never easy. Read on.
m.nlcode.nl is written in Java with JavaFX. That means that every platform that has Java/JavaFX support should be able to run m.nlcode.nl. So having only a Java JDK is not enough; a JavaFX SDK is also needed. http://gluonhq.com provides SDKs for the most mainstream platforms.
Packaging a Java/JavaFX application to run on multiple platforms is still a bit of a challenge. Fortunately Github has multiple hardware stacks, so in theory this could privide for OS X, Windows and Linux versions.
Currenly I only have a Macbook Air with x86 Intel chip in it, and I can make use of one with an M1 Apple chip. And I still need to setup Docker to run Linux containers for testing. That means that at this point in time I cannot easily verify if the Linux and Windows versions actually work. That is why most distributables have UNVERIFIED in their names. If you can run them, please let me know so I can remove that UNVERIFIED text from the names of distributables that are known to work.
If you know what this is an you think you need it, please contact me.
Note that I have not yet enrolled in the Apple developer program, so I cannot at this point sign my distributables. Which means you have to take the System Settings | Privacy & Security route when you want to install or run m.nlcode.nl. High enough usage numbers of m.nlcode.nl will entice me to shell out the yearly $99 needed to be enrolled. If this unsigned bothers you, you can always clone the m.nlcode.nl repo, review the source code for bad stuff and run the release process in your clone yourself.
I have noticed that the OS X X86 version seems to run just fine on an M1. The OS X aarch64 version though ran neither on the M1, nor on my x86 Intel Macbook Air. This may be different for you. If so, please let me know. Thing is that the libraries for a x86 and a M1 machine are supposed to be different and (according to the docs) support only one of the two architectures.
I have no Windows machines. I have been able to get Windows somewhat running on my Mackbook Air under Virtualbox, but the sound was unreliable. Which explains the UNVERIFIED in the names of the distributables. I did see a completed running installation of an AMD based Windows machine.
I have not yet gotten around to setting up Docker with Linux containers on my Mac. Which explains the UNVERIFIED in the names of the distributables.
There are several options available from this point. The are described below, in order of complexity with the simplest first.
While one can use a JDK version 18 or higher, I would advise to use a JDK version 17.0.8 or a higher version 17 JDK.
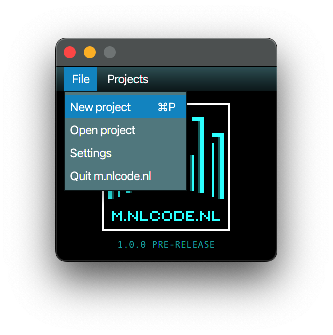
Before addressing individual MidiInOut parts, you should first understand what a project is. A project is a collection of MidiInOut parts that can:
So a project is your main work space in which you work with MidiInOut parts and connect them to each other. Multiple projects can be open at the same time, but an instance of a MidiInOut part can only belong to one project. I will take for granted that you know how saving and loading works, so no example here on saving and loading a project.
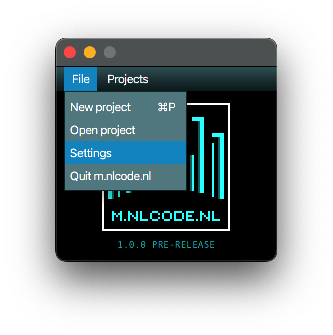
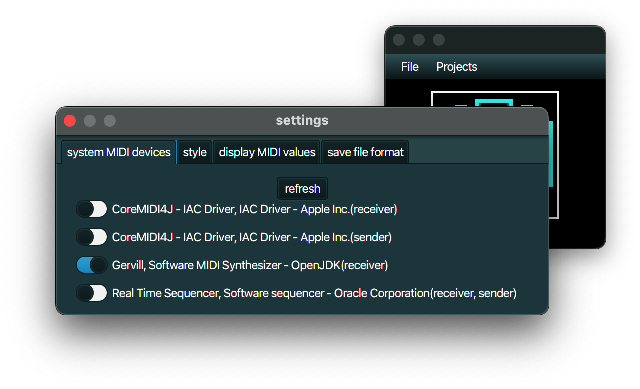
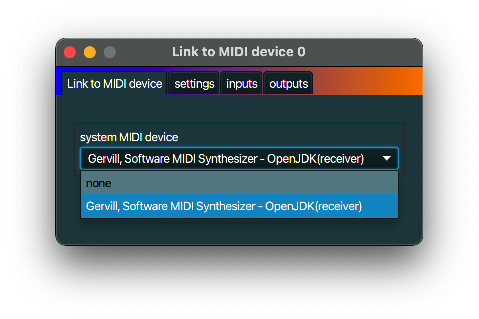
m.nlcode.nl can work with other MIDI capable applications and drivers that are known to the operating system of your computer. But you first need to specify which ones you want to be able to work with in your projects.
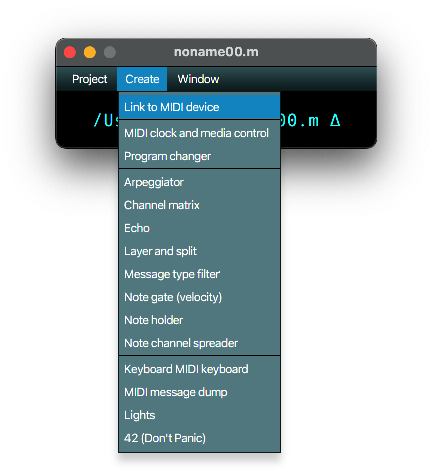
MidiInOut parts are the building blocks for building a project that can monitor, change, filter and create MIDI data. That is basically it. A simple example will probably say more.

If you hear no sound, check the volume. If the volume is ok but you do not hear any sound, then I am afraid you should troubleshoot further on your own. Note that a Keyboard MIDI keyboard is basically a simple test util and in no way a replacement for a proper MIDI keyboard.
As you have seen in the above example, MidiInOut parts can be connected to send MIDI data to one another. Connections are two way in that senders obviously know to which parts they are sending, but the receiving parts also know their senders. Note that a MidiInOut part can have multiple senders as well as multiple receivers. Use the shift or control keys while clicking to select and deselect (multiple) MidiInOut names.
Example: expanding on the same example as above, do the following.
MIDI Lights is an example of a MidiInOut without any ‘out’. It is simply something that gives a visual representation of MIDI data, but does nothing to the data it receives, not even sending it on. That also means that it has no ‘output’ tab and it cannot be selected as an input for other MidiInOut parts. Keyboard Keyboard is kind of related, in that it can only send output and not receive input.
There is a number of other MidiInOut components. Now that you know the basics of creating them and linking them to each other, feel free to explore. The modularity of m.nlcode.nl combined with the simplistic interface should provide for a low barrier to entry.
All 1.0.x versions will be alpha or beta versions. In other words: pre-releases. 1.1.0 will be the first stable version.
Open tasks that need to be completed before the first release:
No releases yet.
MidiInOut parts are the basic building blocks in m.nlcode.nl. MidiInOut parts can send MIDI messages to other MidiInOut parts, receive MIDI messages from other MidiInOut parts, or both.
Use the inputs and outputs tabs to select the other MidiInOut parts to receive from and send to.
An Arpeggiator plays notes of a chord individually in a progressive rising or descending order.
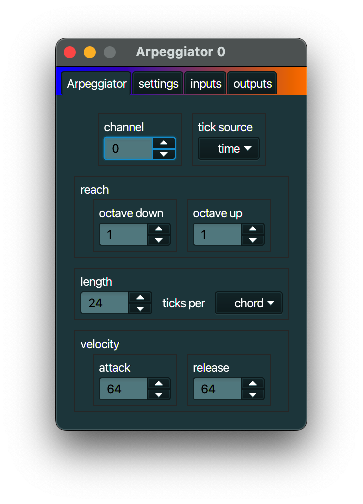
Arpeggiators are used in music creation to create a stream of notes, based on chords and often spanning multiple octaves.
Create a MIDI device link and link it to the Gervill software synth. Link your MIDI keyboard to your computer. Create a MIDI device link and link it to your keyboard. Create an Arpeggiator and let it get its input from the MIDI keyboard and send its output to MIDI device link that is linked to the Gervill synth. PLay a chord on your MIDI keyboard. You will hear the chord notes arpeggiated.
A Channel matrix can redirect all MIDI messages from zero or more MIDI input channels to zero or
more output channels.
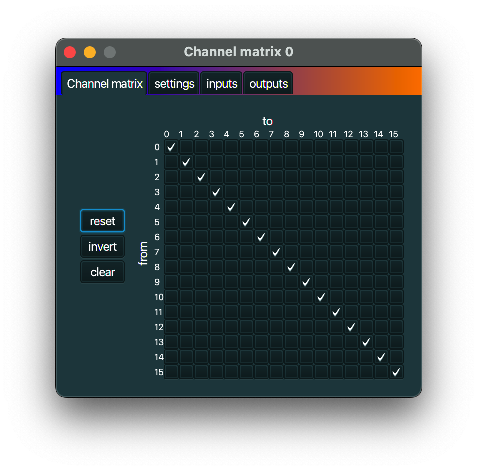
If you want to redirect all MIDI messages coming in on channel 0 to instead be send to channel 1 (or to both channel 1 and channel 2), you can use a Channel matrix.
An Echo can replay notes after a specified delay and with a softer velocity.
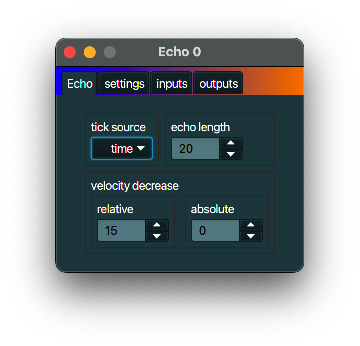
The time between echoed notes is a certain period. That period can be defined relative to the actual time defined by the (computer) clock, or it can be defined by the number of MIDI clock messages. To use the latter you must make sure that such MIDI clock messages are actually received by this MidiInOut, for instance by adding a MIDI clock upstream.
I hope you can fill this one yourself.
Connect an Echo to the outputs of a Keyboard MIDI keyboard to have an echo-like effect on the notes played. Note the ’echo-like’, because most synths will only play one note of a certain sound and the same pitch at a time, instead of overlapping those with different velocities.
A Layer and split can map ranges of keys of one channel to other ranges and channels,
while optionally transposing those keys up or down. You have the availability over a virtually
unlimited number of zones. Zones can overlap as well.
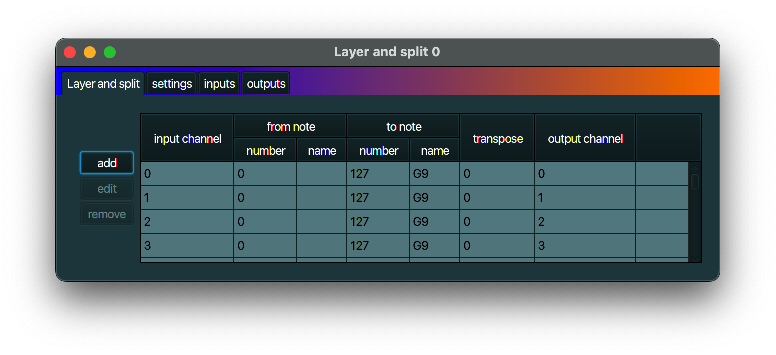
If you have an external MIDI keyboard without build-in splitting functionality, you can use a Layer and split to send keys from one part of your keyboard to one synthesizer and from another part to another synthesizer. Or you can send different ranges of keys to different channels of a multitimbral synthesizer.
Link a Roland JV-1080 to your computer. On the JV-1080 setup a base sound on MIDI channel 0 and a solo instrument on channel 1. Create a MIDI device link and link it to the JV-1080. Link your MIDI keyboard to your computer. Create a MIDI device link and link it to your keyboard. Create a Layer and split and let it get its input from the MIDI keyboard and send its output to the JV-1080. Create a layer in the Layer and split for the keys below C4 and specify channel 0. Create a layer for key C4 and all keys above, and set it up to send to channel 1. If you now press C3 on your MIDI keyboard, you will hear a base sound coming from the JV-1080. If you press C4, you will hear the solo instrument.
A Lights displays MIDI information in a frivolous way. Currently only playing notes are displayed.
A higher velocity yields a brighter colour. Note that this MidiInOut part has no output, only input.
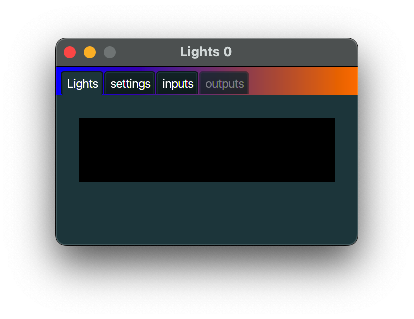
Use for diagnostic purposes to see if MIDI messages are flowing where you would expect them.
A Lights can typically be used for diagnostic purposes.
A MIDI clock generates MIDI timing messages at intervals as specified by as beats-per-minute
(BPM) setting, as well as start, stop and continue messages.
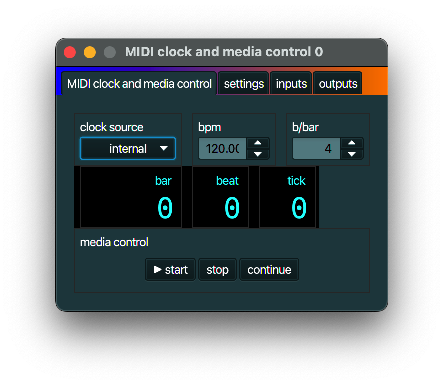
Use a MIDI clock to create MIDI clock messages (0xF8 or 248) for use by e.g. Echo and Arpeggiator.
See typical use case above.
A MIDI device link is a MidiInOut part that acts as a bridge between other MidiInOut parts and
other MIDI software and hardware devices. All MIDI drivers that have been selected in File |
Settings | system MIDI devices in the main m.nlcode.nl application window can be linked to.
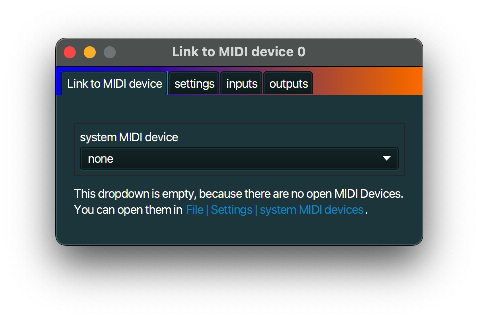
External hardware devices can be used via a MIDI device link.
Connect a MIDI keyboard to your computer. Enable its driver in File | Settings | system MIDI devices. Create a MIDI device link and select the MIDI keyboard driver from its dropdown. The messages generated by the external keyboard can now be used in m.nlcode.nl by other MidiInOut parts.
A MIDI message dump is a MidiInOut part that displays all (or most) of all incoming MIDI messages.
When you set the write to file option, all new incoming messages will be written to file. The
file(s) can be found in the same directoy as the project file.
Note that this MidiInOut part has no output, only input.
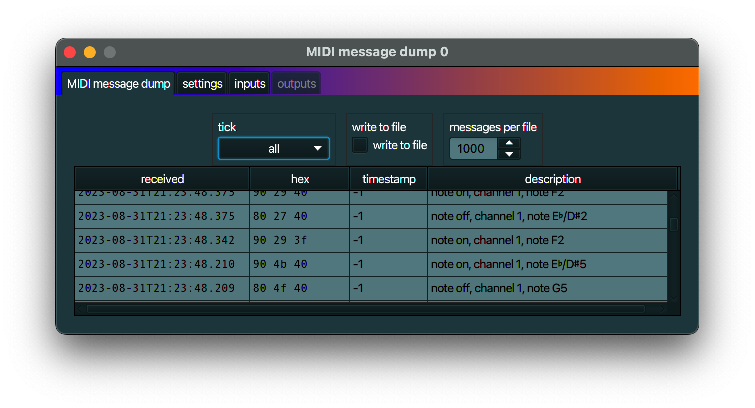
A MIDI message dump is typically used for diagnostic purposes.
Link a MIDI message dump to the outputs of a MIDI device link that is linked to an external MIDI device to see which messages are send from that external device.
A Note channel spreader takes incoming notes from one specific MIDI channel and sends them in a round-robin way via the specified MDI output channels. The first note goes to the channel with the lowest number and which is selected for output. The second note goes to the second channel, etc.
If there are no more channels, the lowest channel will be used again. That way the incoming notes
are spread across the selected channels. Note off messsages will be sent to the same channel as
where its predecessing note on message has been sent.
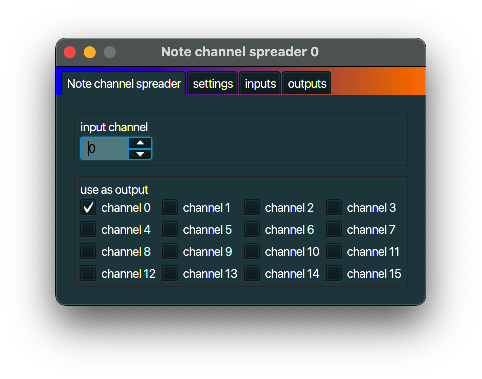
If you have a number of the same type of mono synthesizer (or a number of the same type of synthesizer with a limited number of voices) without support for poly chaining, you can use a Note channel spreader to distribute notes over those synthesizers.
Link three Korg NTS-1 synthesizers to one MIDI hub. Assign each NTS-1 its own MIDI channel, 0 through 2. Create a MIDI device link and link it to the driver of your MIDI hub. Create a Note channel spreader and let it send its output to that MIDI device link. Select channels 0, 1 and 2 for output. Create another MIDI device link, link it to an external MIDI keyboard and make it send its output to the Note channel spreader. Play a three note chord on your external MIDI keyboard. You will hear the notes from your chord simultaneuously from the three NTS-1 synthesizers.
A Note gate (velocity) acts as a gate in that it only sends out notes within certain velocity boundaries.
So basically you use a Note gate as a filter for notes that are too ‘soft’ or too ’loud’.
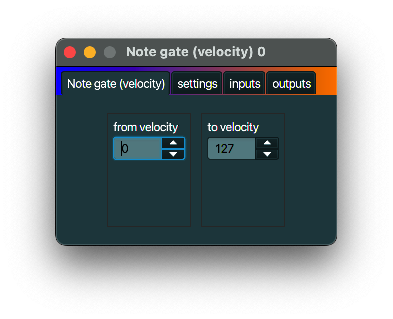
Filtering notes based on their velocity.
No inspiration, sorry.
A Note holder hold notes until those notes are played again. So instead of using a sustain pedal,
you can use a Note holder to keep a note playing after a note off message.
A Note holder can be handy when used together with an Arpeggiator MidiInOut part.
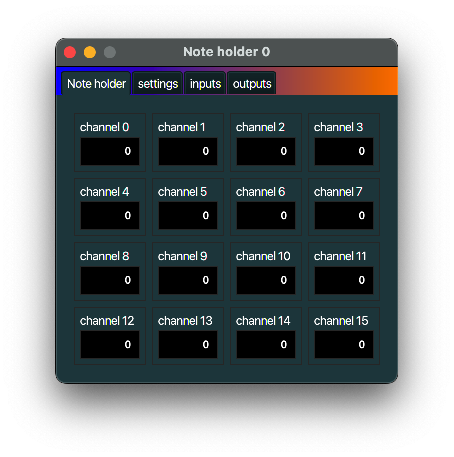
Connect an Arpeggiator to the output of a Note holder to let the Arpeggiator arpeggiate, while you have two hands free.
See typical use case above.
A Program changer can select different patches, instruments, whatever you like to call it.
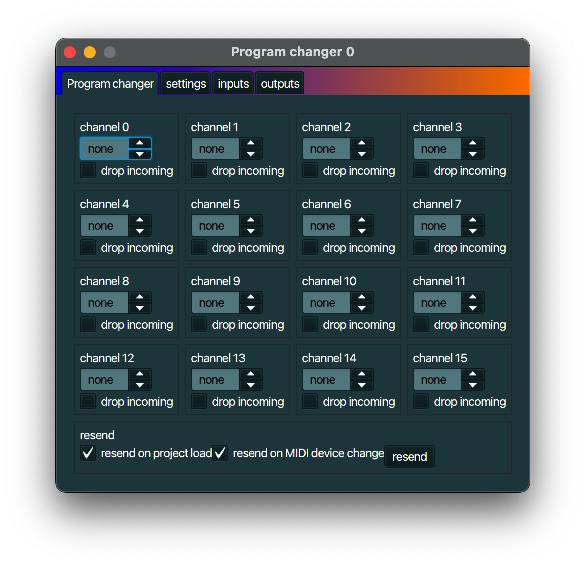
Change the sounds that a synthesizer produces by changing the program.
Connect the outputs of a Program changer to the inputs of a MIDI device link that is linked to a synthesizer. Play a note, select a different program, and play the same note again. You hear a different sound.
A Transposer transposes all note on and note off messages. It tries to be smart with note off messages if you changed the transpose height in between a note on and a note off.
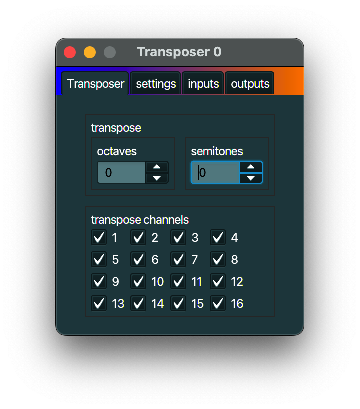
Generate sounds in the same key as that annoying guitarist is playing in, while playing the keys on your keyboard in a key you feel comfortable in.
Connect the outputs of a Transposer to the inputs of a MIDI device link that is linked to a synthesizer. Connect the inputs of a Transposer to the outputs of a Keyboard MIDI Keyboard. Play a note, set the Transposer to transpose a semitone up, and play the same note again. You hear the sound a semitone higher.
m.nlcode.nl and this site: Copyright (c) 2023 - Leo Mekenkamp
m.nlcode.nl is (currently) available under the GNU General Purpose Licence version 3
m.nlcode.nl is written in Java and JavaFX. Special thanks to the people from https://github.com/DerekCook/CoreMidi4J for their Mac Java Core MIDI SPI.